
Automating business processes with Approval Process in Salesforce
Neha Patil
May 26, 2020
Introduction:
Salesforce is known for its business process automation. Various manual activities can be automated using salesforce tools. Business process is largely a series of steps performed by a group of stakeholders. It is the backbone of an organization. For automating business processes salesforce offers multiple tools that automate work and improve productivity in only a few clicks. Some of the tools in salesforce which enable automation are Workflow, Process Builder, Flow Builder, Approval Process.
Approval Process in Salesforce:
In Salesforce, the approval process performs automation to get approval for the records. It plays an integral part in an organization's automation capability and helps save time and effort significantly. In the approval process there are steps of approval, as well as from whom to request approval and what to try to do at every purpose of the process. Learn more about Salesforce advisory services
Below are the steps to maintain approval of records –
- Select the object (standard/custom)
- Specify entry criteria
- Select approver
- Select email template
- Select fields to show on approval page layout
- Initial Submission
- Approval
- Rejection
- Recall
Preplanning steps to form approval process in salesforce org:
Preparation for Approval Process –
Successful implementation of the approval process is planning each process carefully. Review the following checklist before creating an approval process:
- Prepare an approval request email template
- Prepare an approval request post template
- Determine the approval request sender
- Determine the assigned approver
- Determine the delegated approver
- Decide filter criteria
- Design initial submission actions
- Decide from whom users want to approve requests
- Determine awaiting approval
- Decide which records are auto-approved or rejected
- Determine levels of approval process
- Determine the actions once an approval request is approved or rejected
To Create an Approval Process Choose the Right Wizard
It is important to work out which wizard is best for your needs.
- Jump Start Wizard: It is used for the single step approval process.
- Default Selections for the Approval Process Jump Start Wizard: It is an easier way to start with the simple approval process, jumps start wizard automatically chooses some default options for you.
- Standard Wizard:It is used when you would like to define specific steps and approval process is more complex.
- An Approval Step to an Approval ProcessWe can say approval steps are the chain of approval for a specific approval process. Each step contains which records can advance to that step and who to assign approval requests to, and whether to let each approver’s delegate respond to the requests.
- Add Automated Actions Approval processes support four automated actions that are as follows – Approval steps, Initial submission, Final approval, Final rejection, or Recall.
- Activation After creating all steps for the approval process, Activate the process so that it can be brought to use.
Example:
Let’s take an easy example. If an opportunity is discounted more than 40% then make sure manager approves opportunities and approval status reflects on opportunity.
Whether opportunity is Approved or Not Approved.
Build an Approval Process:
Preplanning
- Create Classic Email Template for Approve discounted opportunity.
- Add {!User.Manager} and {!Opportunity.Name} fields in the email body, helps the approver by providing a link to the opportunity record.
- Create “Discount Percent” data type Percent and “Discount Percent Status” data type Picklist (values - Approved, Not Approved) two custom fields on the Opportunity object. Read relevant blog here: Salesforce lightning complete guide
Create an Approval Process
- From Setup, enter Approval processes within the Quick Find box, and then select it.
- Select object to manage approval process | select Opportunity.
- Select Create New Approval Process option | click Use Jump Start Wizard option The Jump Start Wizard helps you create an easy approval process by making some decisions for you.
- Configure the approval process
- Name- Approve Opportunity Discount.
- Approval Assignment Email Template- Approve Opportunity Discount.
- Criteria- Opportunity: Discount Percent greater than 0.4.
- Select Approver- For approval of record select approver.
- Save the approval process.
- Click View Approval Process Detail Page.
- Under Final Approval Actions, click Add New | Field Update, and configure it with these values.
- Name- Approved
- Field to Update - Discount Percent Status
- A Specific value- Approved
- Click Save.
- Under Final Rejection Actions, click Add New | Field Update, and configure it with these values
- Name- Not Approved
- Field to Update - Discount Percent Status
- A Specific value- Not Approved
- Simply activate the approval process
- Created Approval Process in salesforce org as per the above conditions.

- Created one opportunity with Discount percent greater than 0.4 and submitted for approval.
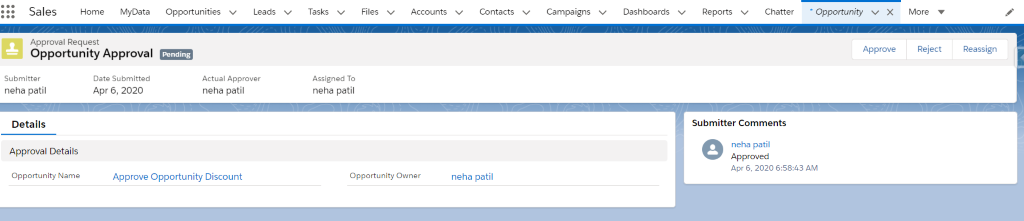
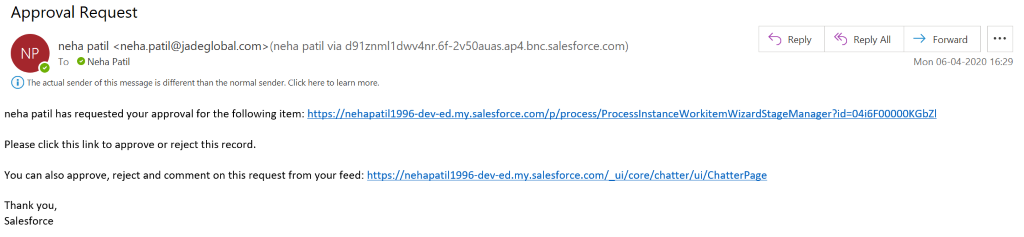
- Email for Approval request.
- Approved submitted opportunity.
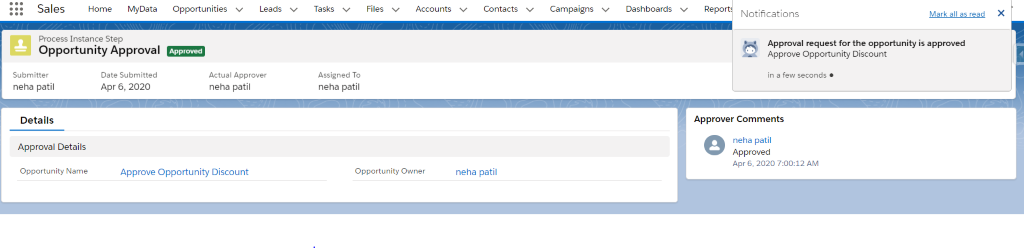
- On Opportunity record Discount Percent Status automatically set to Approved.

Subscribe to our Technology Insights


About the Author

How Can We Help You?
Related Posts