Ways to locate Dynamic Web Elements in Selenium
Krishna Chaitanya Kalaparti
Aug 27, 2020
Web Applications comprise of one or more HTML pages. All the individual units/fields such as - text boxes, buttons, etc., that are contained in a web page, are called Web Elements. On any HTML page, all the elements present on the Data Object Model (DOM) and are rendered by the browser are called Static elements. The elements that are invoked at the run-time and are dynamically added to the web page are called Dynamic elements.
Locating Web Elements is one of the most important steps involved in the automation testing of the Web Application (UI). There are multiple element locators (or selectors) that can be used for finding/accessing the web elements such as: ID, Name, Class Name, Linked Text, Partial Linked Text, Tag Name, XPath, CSS Selector.
Problems with Handling Dynamic Elements:
The easiest way of accessing a Web element is by its ID or Name or Class Name. We can just plug in the respective values to the code and run the program and it would work (provided the Element has respective ID/Name/Class Name).
Eg: driver.findElement(By.id("email")).sendkeys("email@test.com");
What is the problem with the above approach?
Not all web elements are defined with values for ID, Name, Class Name, etc., This depends on the Web Developer’s style of developing the web page, and its completely his/her choice to provide values for ID, Name, and Class Name attributes.
Furthermore, even if the Web Elements are defined with values for the above attributes, they may not be reliable all the time. Confused? Let me explain further. Let’s say we try to access our favorite Social Application Login page:
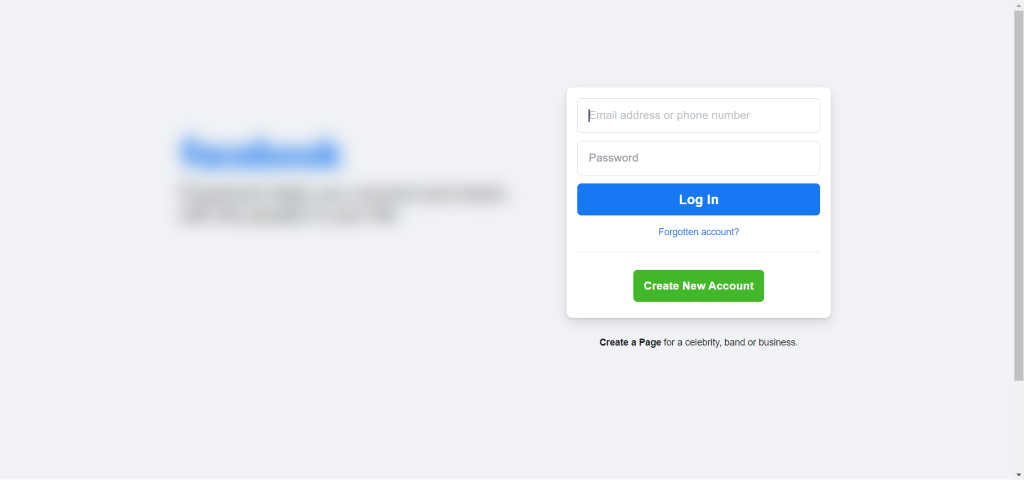
If we are to automate a test of entering the Email address or Phone number field and we want to know the attributes of this element, a simple way is to right-click and click Inspect, then select the field using the left-side arrow button and the element record gets highlighted:

The Highlighted tag in the Elements tab of the Developer Tools window contains the attributes of the Email address or phone number field. Now, while you may be tempted to use the Class attribute with value “inputtext _55r1 _6luy”, there is a possibility that next time when the page loads, this value might be different. Similarly, as a matter of fact, ID attributes that have “Alpha-numeric” values are not reliable and, as a best practice, must be avoided as element locators. Also, if the Class name attributes have values containing space, running programs with such values will give us a Runtime Error saying “Compound Classes not permitted”.
Another problem is if 2 Web Element attributes have the same value, i.e., in the above example, let’s assume that the Class attribute for both Email Address and Password fields have the same values and we use the Class attribute to locate both these elements, and we want to perform some action on the Password field, Selenium scans elements from top-left of the page and the 1st matching element locator will be used. So, our test will fail in this case.
One more thing to note is that Xpath and CSS can be directly copied from the browser, and it works many times. But sorry to break it to you that they may not be always reliable. For instance, Firefox-generated XPath will be lengthy, and incomprehensible at times with no guarantee to work always.
So how do we handle dynamic elements anyway?
It is advised that Selenium Test Programmers write their own Customized XPath and CSS Selectors.
Syntax for Customized XPath:
//tagName[@attribute = “value”]
Eg: //input[@type = “email”]
The Advantage of this: we need not confined to the usual set of attributes used as Element Selectors such as ID, Name, Class Name, etc. We can totally use any of the attributes associated with the Tag in which the element concerned is present.
Similar is the syntax for Customized CSS. Let us have a look:
Syntax for Customized CSS:
tagName[attribute = “value”]
Eg: input[type = “email”]
Note: We can also use regular expressions in our customized syntax
So, Custom XPath can now be: //*[@type = “email”] and Custom CSS can be: [type = “email”], in case we want to use regular expressions.
Other ways of writing Custom CSS:
If we know the ID attribute in the tag of the element we are trying to locate, then we can use the following syntax:
tagName#id
Let us say we have an input tag like: <input id = “in”>Text</input>,
Then we can represent it as: input#in. It is as simple as that!
We have another simplified form of writing CSS selector, this time using the ClassName attribute.
Syntax: tagName.className
Eg: For the element: <input class = “inClass”>Text</input>, our simplified CSS Selector would be: input.inClass.
Usage of Regular Expressions in Custom XPath and Custom CSS Locators:
In cases where we do not know the entire value of an attribute we want to use, or when the attribute is very lengthy and we want to use a part of its value, we would resort to the usage of Regular Expressions inside our custom-written XPath or CSS Selectors.
Below are the Examples:
Regular Expressions in Custom XPath Syntax: //tagName[contains(@attribute, ‘value’)]
Eg: //input[contains(@name, ‘userName’)]
Regular Expressions in Custom CSS Syntax: tagName[attribute*= ‘value’]
Eg: input[name *= ‘userName’]
The type of customized or Browser-generated XPaths that we have discussed so far is all “Relative XPaths”. Relative XPaths do not have any dependency on their Parent nodes [elements in the hierarchy in HTML code].
Absolute XPath, on the other hand, denotes the Path of traversal of the Root/Parent node all the way to the Child Node, which is the Web Element of interest for us.
For Eg, a Sample Absolute XPath looks like the below:
//section/div/div/div/div/ul/li[2] – This would be pointing to an element in a list
In comparison, Relative XPath is the preferred selector used by many of the developers.
XPath Selectors are better to use when you need traversal between different nodes, as compared to CSS Selectors
To put it in context, if we know the XPath of an element, we can traverse to its Sibling, in case it’s a part of a group element or we can traverse to its parent element.
Eg:- We know the XPath of a list element as:- //*[@id = “tablist1-tab1”].
To derive the XPath of its successor in the list, we can write the following XPath:-
//*[@id = “tablist1-tab1”]/following-sibling::li[2]
Observe the /following-sibling::li[2] expression in the above XPath example. This expression will lead us to traverse to the sibling of the original element and access it.
For the same element, if we need to derive the XPath of its parent, then the syntax will be:
//*[@id = “tablist1-tab1”]/parent::ul
Since the parent will be an Unordered list in this case, we write its tagName in the expression: /parent::ul
We also have another unique way of writing XPath locators and this is using the Element Texts
Let us consider a scenario in which we do not have the HTML pages built yet, but we want to start writing the Automation tests. In this case, if we have the detailed Specifications, then we can tell what the names of the elements would be.
For instance, we need to click on a button named “Submit” for a test, then our XPath locator would be as follows:
//*[@text() = “Submit”]
Conclusion:
Using the readily available attributes of a web element is not always as straightforward as it looks for various reasons. Hence, it is best to write custom XPath or CSS Selectors. It is said that CSS Locators are 10X faster than the XPath Locators. However, XPath Locators also have various benefits. Automation developers can decide which one to use based on the scenarios.
Contact Jade's team to discuss your digital quality assurance needs
Subscribe to our Technology Insights


About the Author

How Can We Help You?
Related Posts