
Integrating On-Premise data sources with Enterprise Performance Management Cloud
Sandeep Gupta , Harshita Kothari
May 19, 2020
Financial Data Management Enterprise Edition (FDMEE) is a tool that helps in transforming and loading data from several sources into EPM Cloud. Be it HPB, HFM, PBCS, FCCS, and other EPM products, FDMEE plays a vital role, in integrating various data and metadata source systems to the application.
Integrations are mostly, either, seamless, i.e., a direct connection between the source system and target system or file-based, i.e., generating a file, in an acceptable format in the source system, like while using Financials, HCM or NetSuite, as source and loading that file in the target EPM application. Learn more about Oracle Financial cloud services
With the advent of EPM Integration Agent, in the release of EPM Cloud 19.10, the functionality for connecting EPM Cloud, directly with On-Premise source systems like EBS (E-Business Suite) and other SQL Data Sources, like Oracle, Microsoft SQL Server, PeopleSoft GL, is provided.
Advantages of Using EPM Integration Agent:
- Pool the Actual data from EBS, PeopleSoft or any SQL data sources.
- The Agent can also be used to connect to 3rd party systems using REST APIs as well as systems using Python or Groovy Scripting.
- It can also be scheduled hence easing the automation process.
- It is a Java application that is similar in concept to EPM Automate and it acts as an https server.
- Multiple agents can execute simultaneously, and agents execute in two modes – Synchronous & Asynchronous.
EPM Integration Agent Prerequisites:
- It requires a version 8+ JRE to run.
- It requires JDBC to connect to relational data sources and the data extract file, which is generated as per the SQL queries, is uploaded to the EPM Cloud. The query, which is used to generate data extract file, is defined in data Integration.
Installing & Configuring EPM Integration Agent:
- Install JDK on the machine, and set up JAVA_HOME, by updating its path in Environmental Variables under the Advanced tab of System Properties.
- Download EPMAgent.zip, through the Application-> Data exchange-> Data Integration-> Click on Actions & select Download Agent. Extract zip file, in the destination folder, AGENT_HOME.
Add Cluster. Click on Application-> Data exchange-> Data Integration-> Click on Actions & select Agent. The default cluster is EPMCLUSTER.

Once the agent is started, the Agent Cluster will be updated with Web URL & Physical URL.

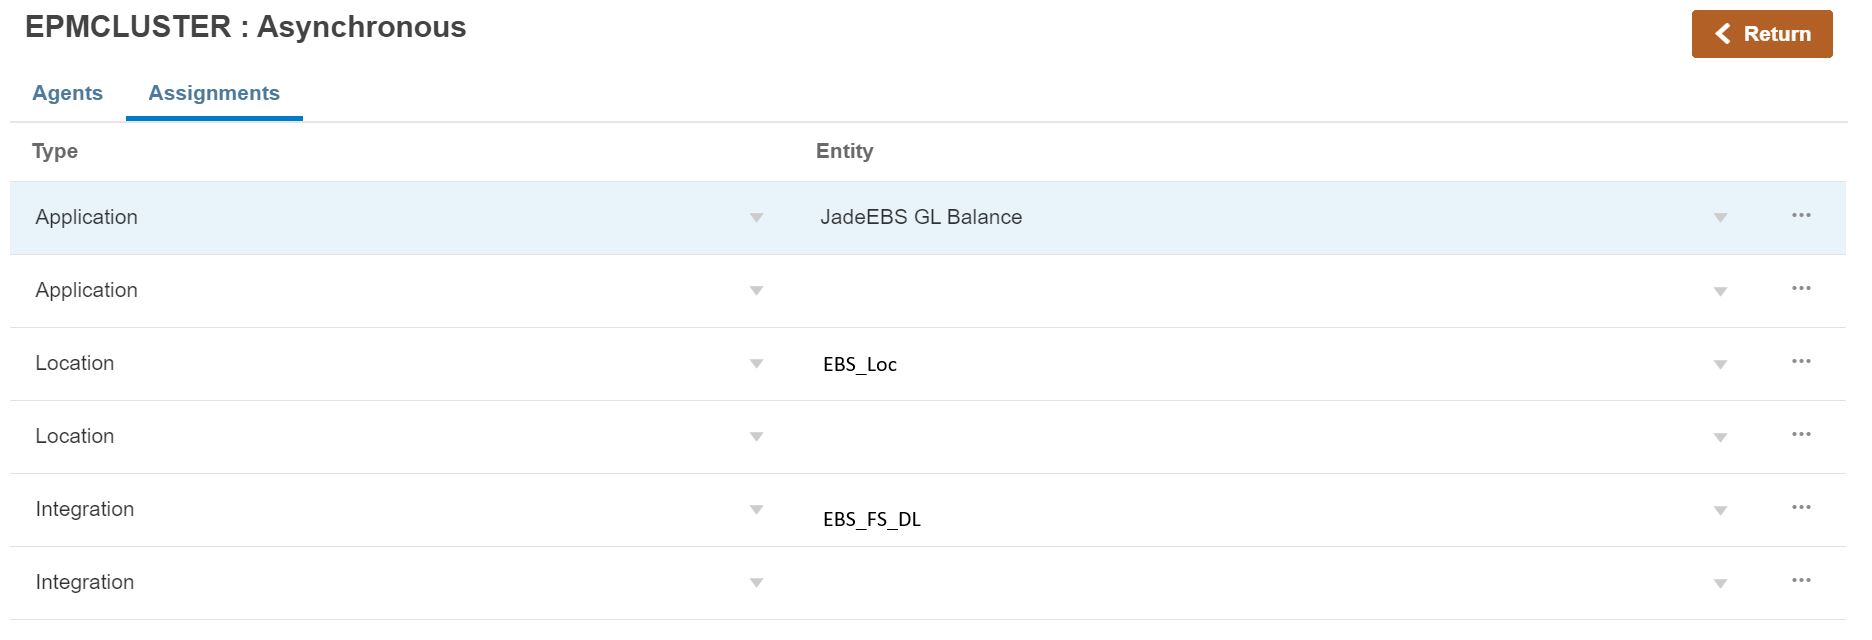
Go to Assignments -> and update the Integration, Location and Application details.
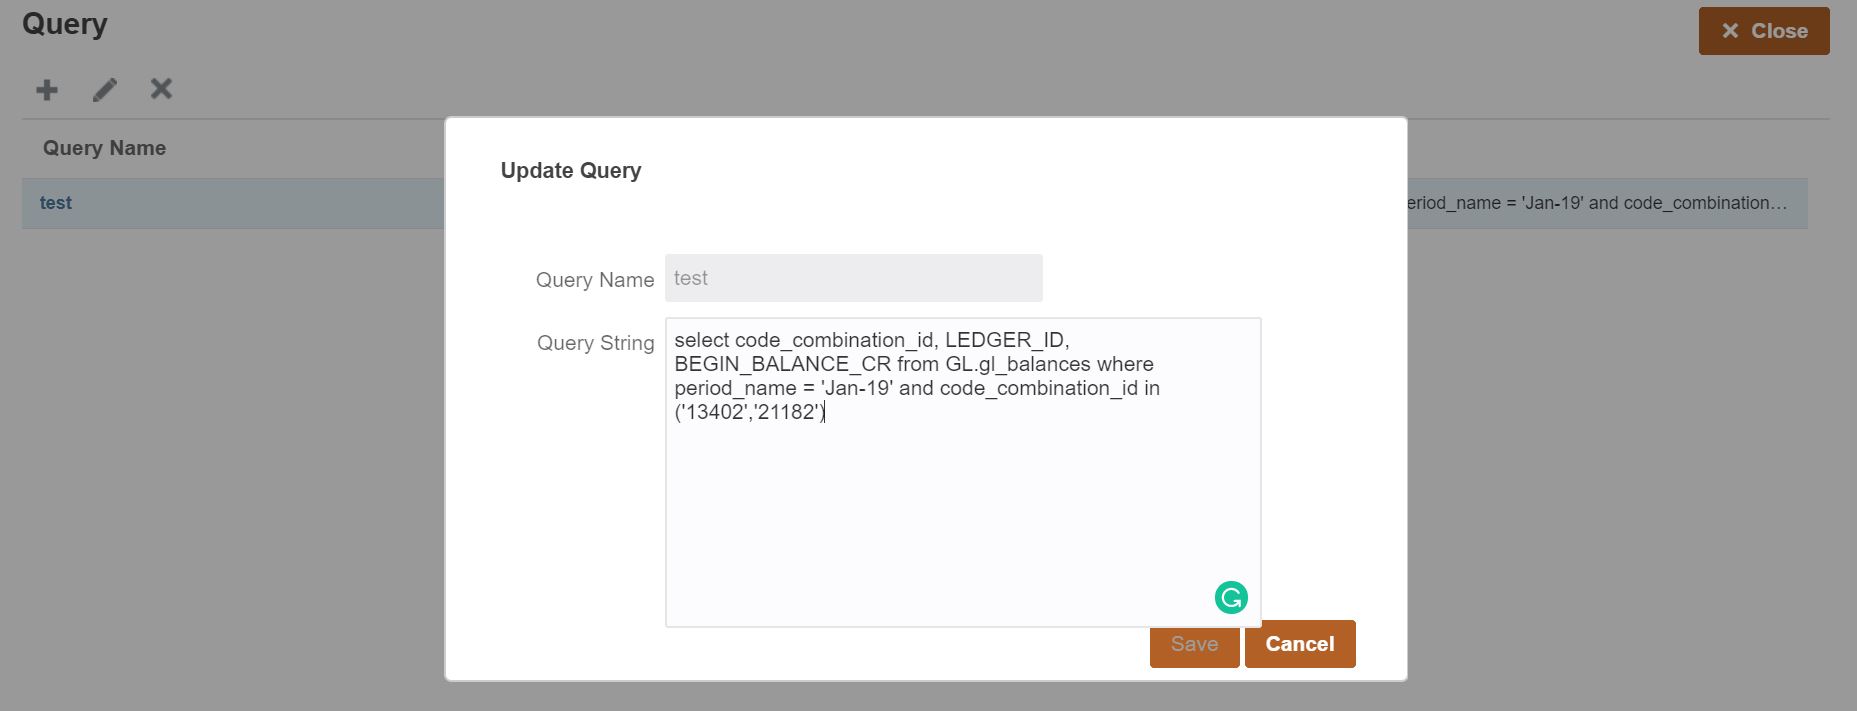
Go to Data Exchange-> Query. Create a new Query and specify the query used to extract the data.
- Import SSL Certificates. To download certificates, log into cloud instance-> Click on Padlock icon-> Click Connection-> Click More Information-> Click on View Certificate-> Click on Details Tab->Select the domain and Click Export to the directory EPM_AGENT_HOME/cert.
- To create Application Folders which store data, logs & configuration files, change working directory by typing cd AGENT HOME/bin directory, at command prompt-> Run createAppFolder.bat C:\EPMAgentData. Once this file is executed, it will create application folders, under a directory, EPMAgentData.
- Encrypt EPM Cloud User password, using encryptpassword.
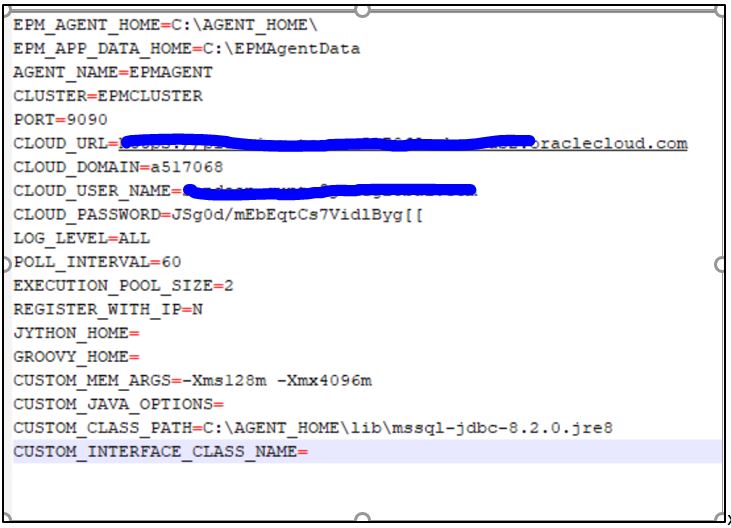
- Configure EPM Agent Startup Parameters by opening agentparams.ini file in C:\EPMAgentData\config directory and specify all the information. Also, update the JDBC driver path, where the JDBC is installed on the system, under CUSTOM_CLASS_PATH.
EPM Cloud to On-Premise Connectivity using EPM Integration Agent:
- To execute the query create a DB Connection. Extract the query result in a CSV file.
- Add on-premise Database as the source system, in the Data Integration and select the CSV file, generated in the previous step.
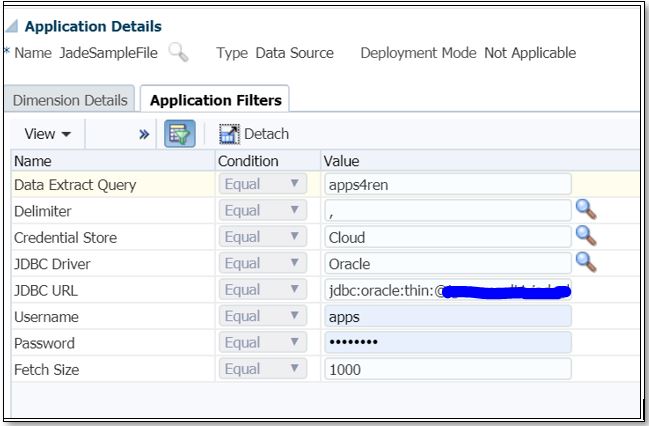
Select Application Filters tab-> Specify Query Name in Data Extract Query-> Select Delimiter-> Select either Cloud or File in Credential Store, for Cloud store username/password/connect string in the application, for File, create a file, appname.cred in config directory, in on-prim environment with JDBC URL, username & password-> Specify JDBC Driver & JDBC URL-> Specify on-premise Username & Password-> Specify Fetch Size-> Click Save.
Go to Edit Additional Filters and enter JDBC Driver and JDBC URL details.
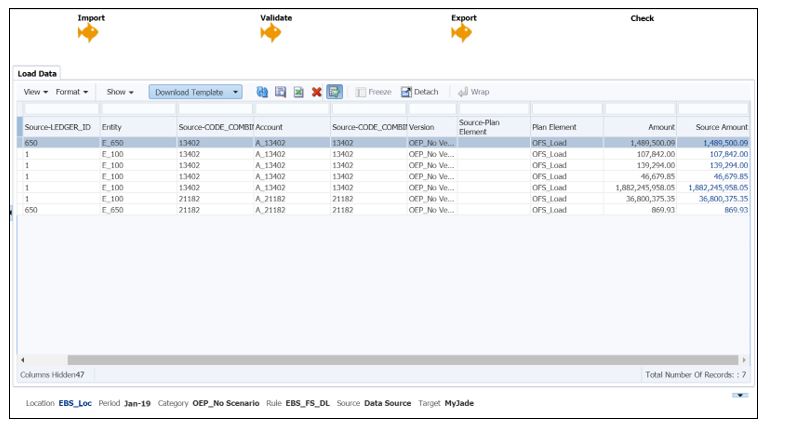
- Create an Import Format with On-Premise database as a source and EPM Cloud as Target. Create Location, Period Mapping, Category Mapping, Data Load Rule, Mapping for all the dimensions in the same way, as it is done for other integrations. Execute the data load rule by specifying the relevant Start Period and End Period. Once the rule has finished successful execution, verify the data on Workbench.
Go to Workbench to verify the data.
The EPM Integration Agent has relatively eased up the Integration process, by establishing direct connectivity with various source systems.
Subscribe to our Technology Insights


About the Author

How Can We Help You?
Related Posts