
How to Install and Configure Dataloader in Salesforce
Harika Parepally
Apr 08, 2020
Salesforce Data Loader Overview: Understand Your Data
- Whether moving from another CRM application or simply tracking customer information in spreadsheets, you’ll already have existing data. Data becomes a bottleneck if it’s not reviewed and cleaned early in a project.
- Most customers underestimate the effort it takes to clean up, map, and load data. Data shouldn’t be loaded until your system is set up, including setting up your role hierarchy, sharing model, and sharing rules.
- By taking the time to understand your data during the planning stage, you can help define critical questions such as “Are we tracking crucial data?” and “What else should we be tracking?”
How to Install Data Loader in Salesforce: Prepare Data for Import / Update
Because data is loaded at a specific time, the transition will be easier if the data load is as close to deployment as possible. Be sure you schedule enough time to map and test the data. Here’s a summary of the steps involved in importing data.
Salesforce Data Loader installation steps:
- Plan your data import
- Prepare your data
- Test the import
- Execute the import
- Validate your data
Note: If users are still entering data into an existing system after the initial data load but before the go-live or cutover plan, there may be a set-up “delta” data set. You’ll need to import or manually load that data and incorporate it into any training exercises
Best Practices / Notes to System Admin
- System Admins should use the Salesforce Data Loader application. Highly suggested Data Loads are actions only done by System Admins.
- If unsure of the process, data load in UAT (Sandbox) before attempting to load in Production. Also, you must import a small test file first to ensure you’ve prepared your source data correctly.
- As a best practice, Review the data being loaded by pulling reports and ensure that fields required to be filled for triggers/flows/rules functionality are filled in.
- Review Schema Builder for the data architecture and see how the objects and fields are mapped to other objects. Note: Schema builder will not provide data on triggers/workflows built for your organization.
- When performing a large data load (especially if triggers/rules could update data in other objects), ensure backup data has been exported for the live environment before performing the data load action. Learn more: Salesforce integration services
Instructions on Installing Salesforce Data Loader
- The Salesforce Data Loader requires the use of the Force.com API. Suppose your Salesforce edition allows the use of the API (Enterprise, Unlimited, and Developer Editions). In that case, you can download the Salesforce Data Loader from the Set-up menu under Administer heading - Data Management.
- First, Download Salesforce Data Loader onto your computer
- Go to Set-up in Salesforce -> type in Salesforce Data Loader in Quick Find /Search box -> download, depending on your Operating System.
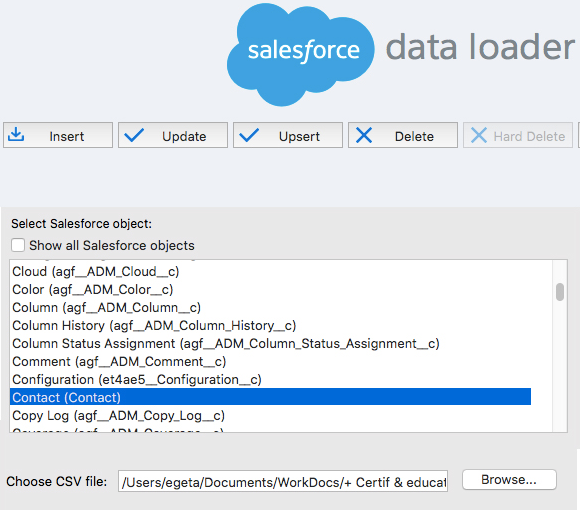
Once installed. Open the Salesforce Data Loader application on your computer.
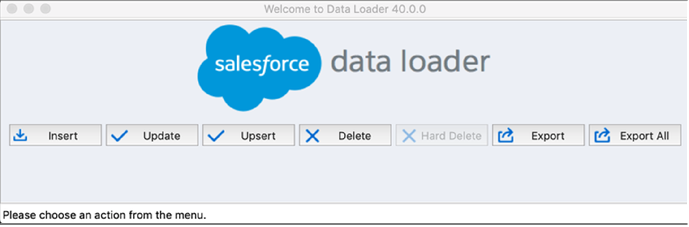
- Insert records into the object selected
- Update records in the object selected (must have record IDs)
- Upsert, insert and update records into the object selected. (if updating must-have record IDs)
- Delete records from the object selected (must have record IDs)
- Export records from the object selected.
- Export All records from the object selected (this will include soft-deleted records (which means items in the recycle bin) as well as Activities (this is the Activities object, not other activities) related to the record)
Configure Salesforce Data Loader: (Very important to review this link) https://developer.salesforce.com/docs/atlas.en-us.dataLoader.meta/dataLoader/configuring_the_data_loader.htm
Important Notes / Best Practices before Insert / Update
- If inserting / upserting/updating records will cause triggers/rules/flows to fire, then it is highly recommended to update the batch size to a very low number, depending on the number of flows/triggers possibly even set the batch size to 1 if a lot of actions are triggered from a record being created/updated.
Again, Open the Salesforce Data Loader Application
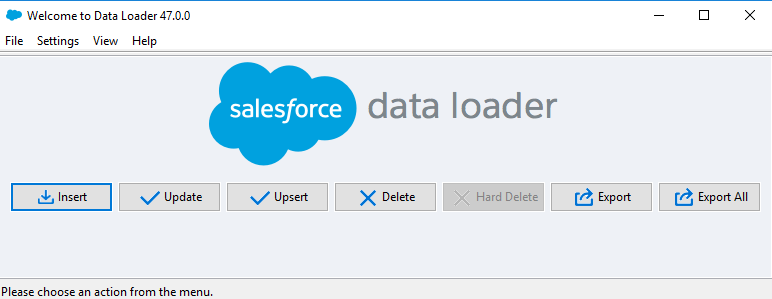
Select an action from the menu
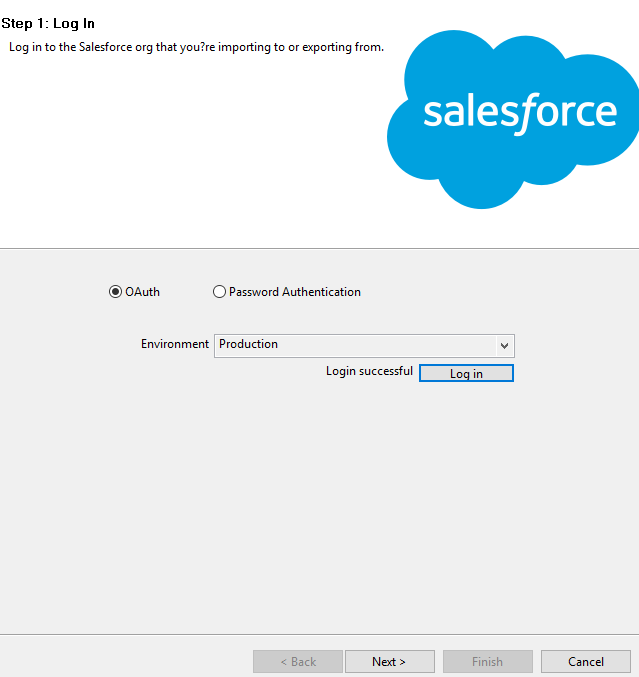
Step 1: Log In
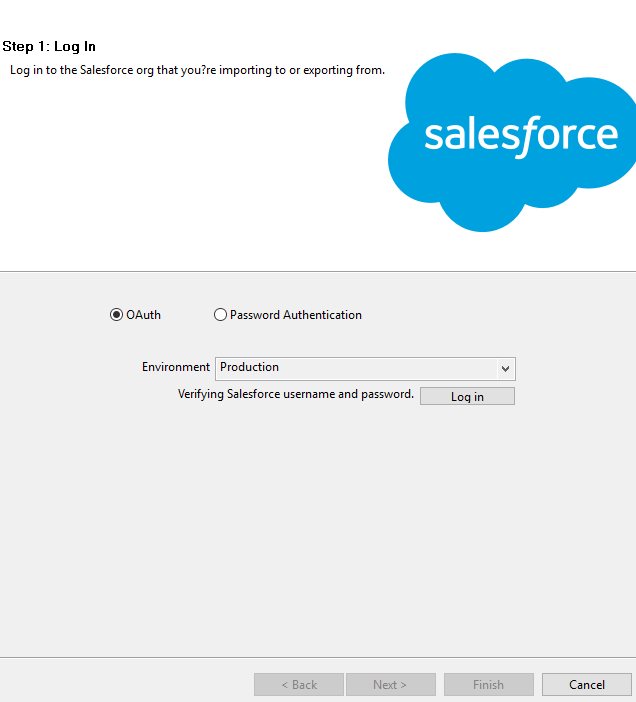
- Choose Environment: Production or Sandbox.
- Enter your Salesforce Username or Password for that environment.
- Will receive the following popup, once signed in:
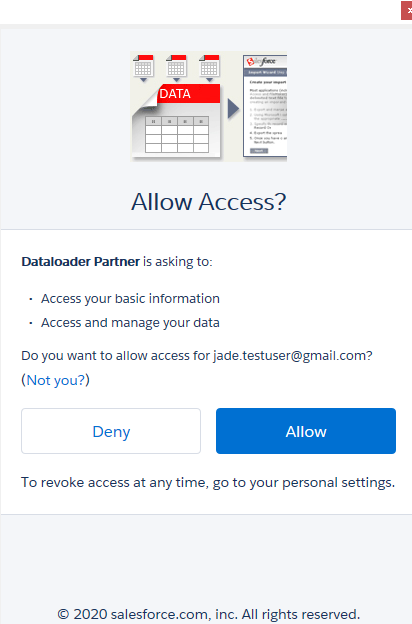
- Choose Allow
- Then click Next on Data Load Application
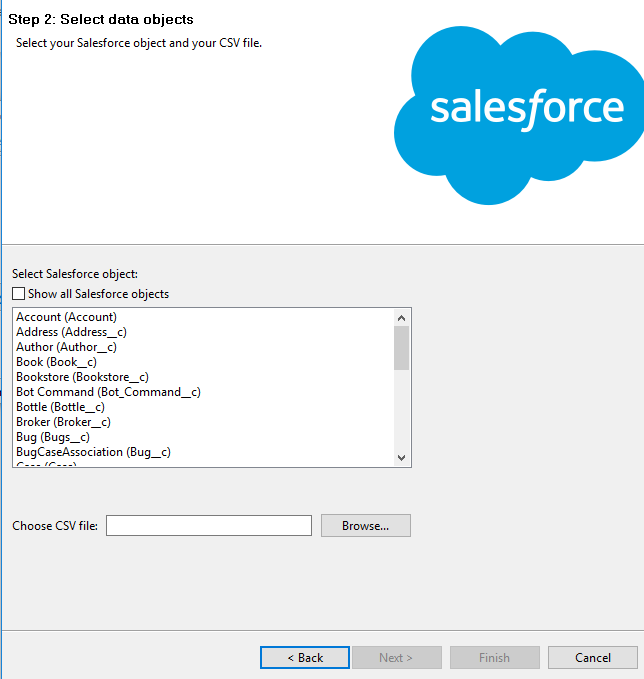
Step 2: Select Data Object and upload your Comma Separated Value (CSV) file (files must be saved in CSV format to data loader)
- Select the Salesforce Object for which the action selected will be performed
- Upload the CSV File:
File Naming Conventions
Save your CSV files in a folder and name them in a format with the action (Update/Upsert/Insert/Delete) info in the file name; maybe even keep the date on the file name and store them in the same folder as your success and error files.
For example, Update Account and Contact 3.24.2020
Also, do not update this file after the data load action has been performed as the same name, always “Save As” and create a new file.
For example, Update Account and Contact 3.24.2020 -Version 2
Best Practices around the Data load file
- Ensure no rows are completely blank in between the data
- Ensure your file has column headers/mapping that will work for you to ensure the correct fields from the object are mapped to the columns in the data.
- Files must be set up as Column Headers, not Row Headers. Only the 1st row should have column headers.
- Ensure Data is in the proper format depending on the fields being updated for that object’s record.
Reference fields (Lookup Fields) should always be in the format of the Salesforce record ID of that Lookup object
For example: if referencing an Account on Contact, enter the Salesforce ID of that Account instead of the “Name” of the Account. The best practice is to use the 18 C ID for that record in the lookup. Also, to ensure data quality, ensure that all Salesforce IDs you enter in Data Loader is in the correct case.
- Checkbox Field:
- TRUE defines the field to be checked for the record.
- FALSE defines the field to be unchecked for the record.
Date Formats there are other formats specified here:
(Jade Preference - (MM/DD/YYYY))
After the file is uploaded and the object has been selected, Salesforce will calculate the number of records on which the Insert/Update/Upsert/Delete action will be performed (Salesforce automatically excludes the first row in the count (as this is the header row). Ensure the number of records seems accurate depending on the number of records in the CSV sheet.
Click ‘Next’
- Click ‘Next’.
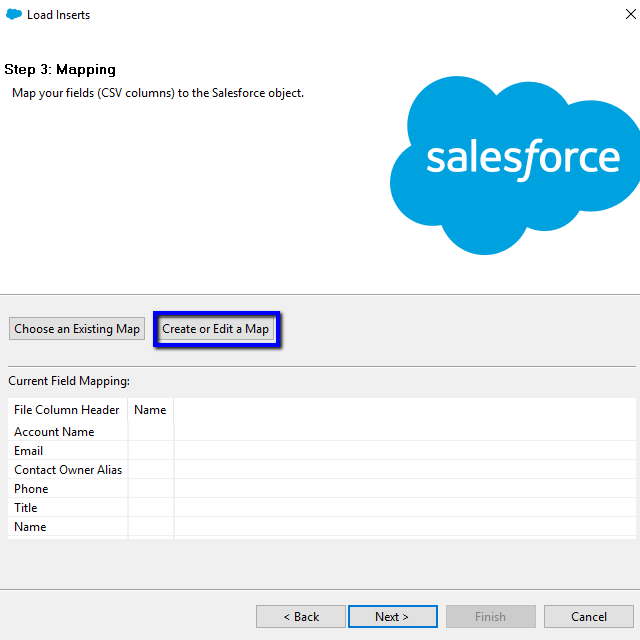
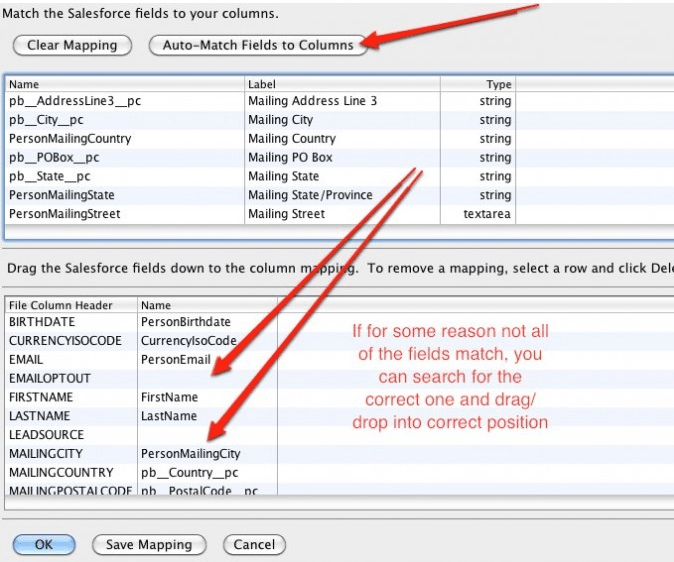
Step 3: Mapping
- Choose an existing Map if there is a saved mapping from the last time; you may have data loaded in this type of file with this action. Please remember this mapping is saved based on the column headers when the mapping file is created.
- Auto-Match field to Columns.
- Best practice: (if column headers in the data file match the field API names from the object, this will ensure proper auto-match; otherwise, review of the mapping is required). Also, ensure you only map the fields that need to be updated for the action being performed, not the other fields in the file.
- Drag and Drop the field to map to each column header.
- Save mapping (optional) - but if you want to save mapping: do so before clicking OK on this modal.
Best Practice: Save the Mapping file in a separate folder, also, ensure the action (Insert,
Update, Upsert) for the data load is in the name of the file. ex. Insert Account Contact
Step 4: Finish
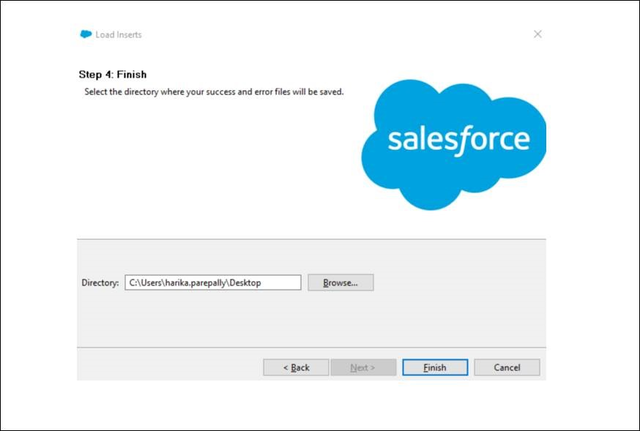
Before clicking Finish to perform the action identified, please ensure the success and error files will be saved in the folder preferred. The best practice is to save it in the same folder as the CSV file used to perform the action.
Subscribe to our Technology Insights


About the Author

How Can We Help You?
Related Posts